Manual Registration and Pyre
When automated registration fails the Pyre (Python Registration) tool is used to repair the transform for later operations on the volume.
Pyre commands
The blinking point is the currently selected point
Mouse
Left Button
<Left Click>to select an existing point
Shift + <Left Click>to add a new point
Alt+Shift + <Left Click>to add a new point and auto-align
<Left Click> + dragto move point under the cursor
Ctrl + <Left Click> + dragto translate entire warped image
Alt + <Left Click>to move currently selected point to mouse position
Right Button
Shift + <Right Click>to delete point under the cursor
<Right Click> + dragto move the view
Scroll wheel
<Scroll wheel>zoom in or out
Ctrl + <Scroll wheel>to rotate warped image
Ctrl + Shift + <Scroll wheel>to rotate warped image slowly
Keys
A,W,S,DMove the view
Page Up/DownChange the magnification
MMatch the view on all windows to look at the same point as the current window (Not Functional for Warped Image)
LShow transform mesh lines
fFlip the warped image
SpaceAuto-align the selected point
Shift + SpaceAuto-align all points
Ctrl+Zto undo a step
Ctrl+Xto redo a step
TabChange properties of the view. A warped image may be displayed as it appears registered. The composite view will switch to a different view.
Finding registration errors
Brute force registration is the first step in registration. If the initial rotation or translation is incorrect then later refinement stages will fail.
Each group of stos transforms lives in a directory at the same level as volume sections. Nornir creates overlay images for every transform in the group showing how well the slice aligned with the adjacent section.
The fastest way to detect misregistration is to open the overlay images for a stos-group and look for problems. For examples we will use a build of the 6263 PMG dataset found in test files and built with the CMPBuild and CMPAlign pipelines.
Examing the output of the final slice-to-slice grid refinement pipeline with a downsample of 2 the Glutamate (“E”) section not aligning well with a Glycine (“G”) section. The relative path of this image under the 6263 volume directory would be:
/TEM/Grid2/overlay_5-6_ctrl-E_LeveledShadingCorrected_map-G_LeveledShadingCorrected.png
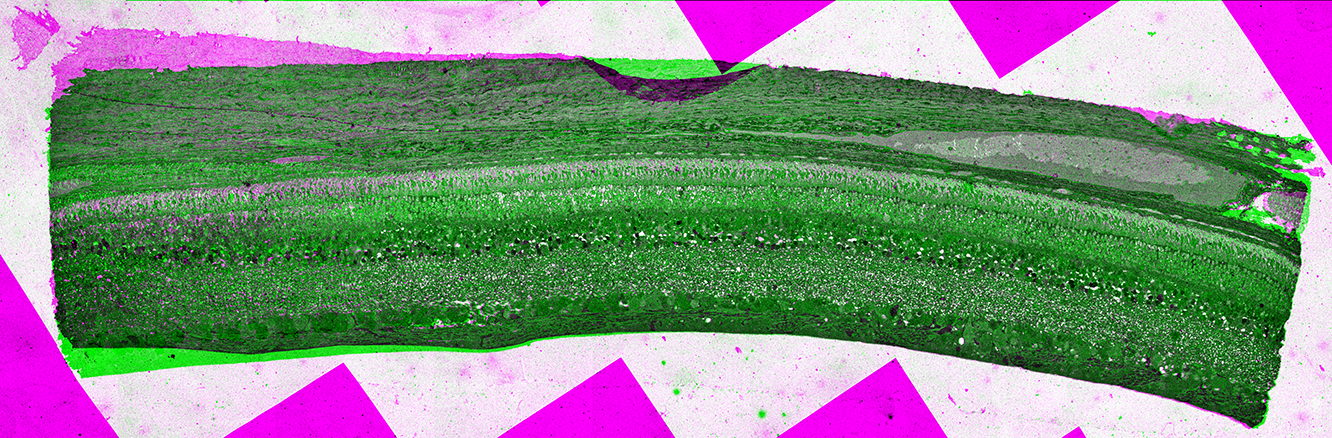
This mis-registration is close but still a failure. Modifying the pipeline by adding iterations to the refinegrid operation may fix this error, but that is time consuming.
Fixing errors
When working with large images the preferred method is to examine an early slice-to-slice registration stage, usually a group named “brute” or “grid” with the highest number. Pyre is used to quickly create a simple transform containing only a few points to provide the correct the angle and translation. The rest of the pipeline is then re-run. This is usually sufficient to allow later refinements to succeed which provide an alignment quality beyond what a human will typically take the time to do.
Stos Group Folders
Each stos group folder has the following content
<GroupName>
*.stos
Overlay_*.png
Warped_*.png
Automatic
Manual
The manual folder provides a replacement for the stosgroup’s normal output. By placing a file here with the same name as an output .stos file we are telling the buildscripts to skip automatic registration and simply to copy the manual .stos file up to the group folders .stos files.
The automatic sub folder contains the input stos-group transforms adjusted to contain the proper input filters and scale. It does not need any interaction.
Repairing a .stos file
Pyre is a GUI provided with the Nornir for the manual generation of stos files. Pyre can write both .stos files or registered images. This enables one to bypass the entire nornir-buildmanager if desired.
To fix our misregistration we will launch Pyre from the Python scripts directory:
python start_pyre.py
Loading data into pyre
Drag and drop the stos file of interest from the stos group directory onto the Pyre UI. (I have seen bizarre behavior from Drag and Drop in Wx Python. If Drag Drop does not work please load using the File -> Open Stos menu option)
If there is no .stos file available you may drag images into the moving or fixed image windows of Pyre directly.
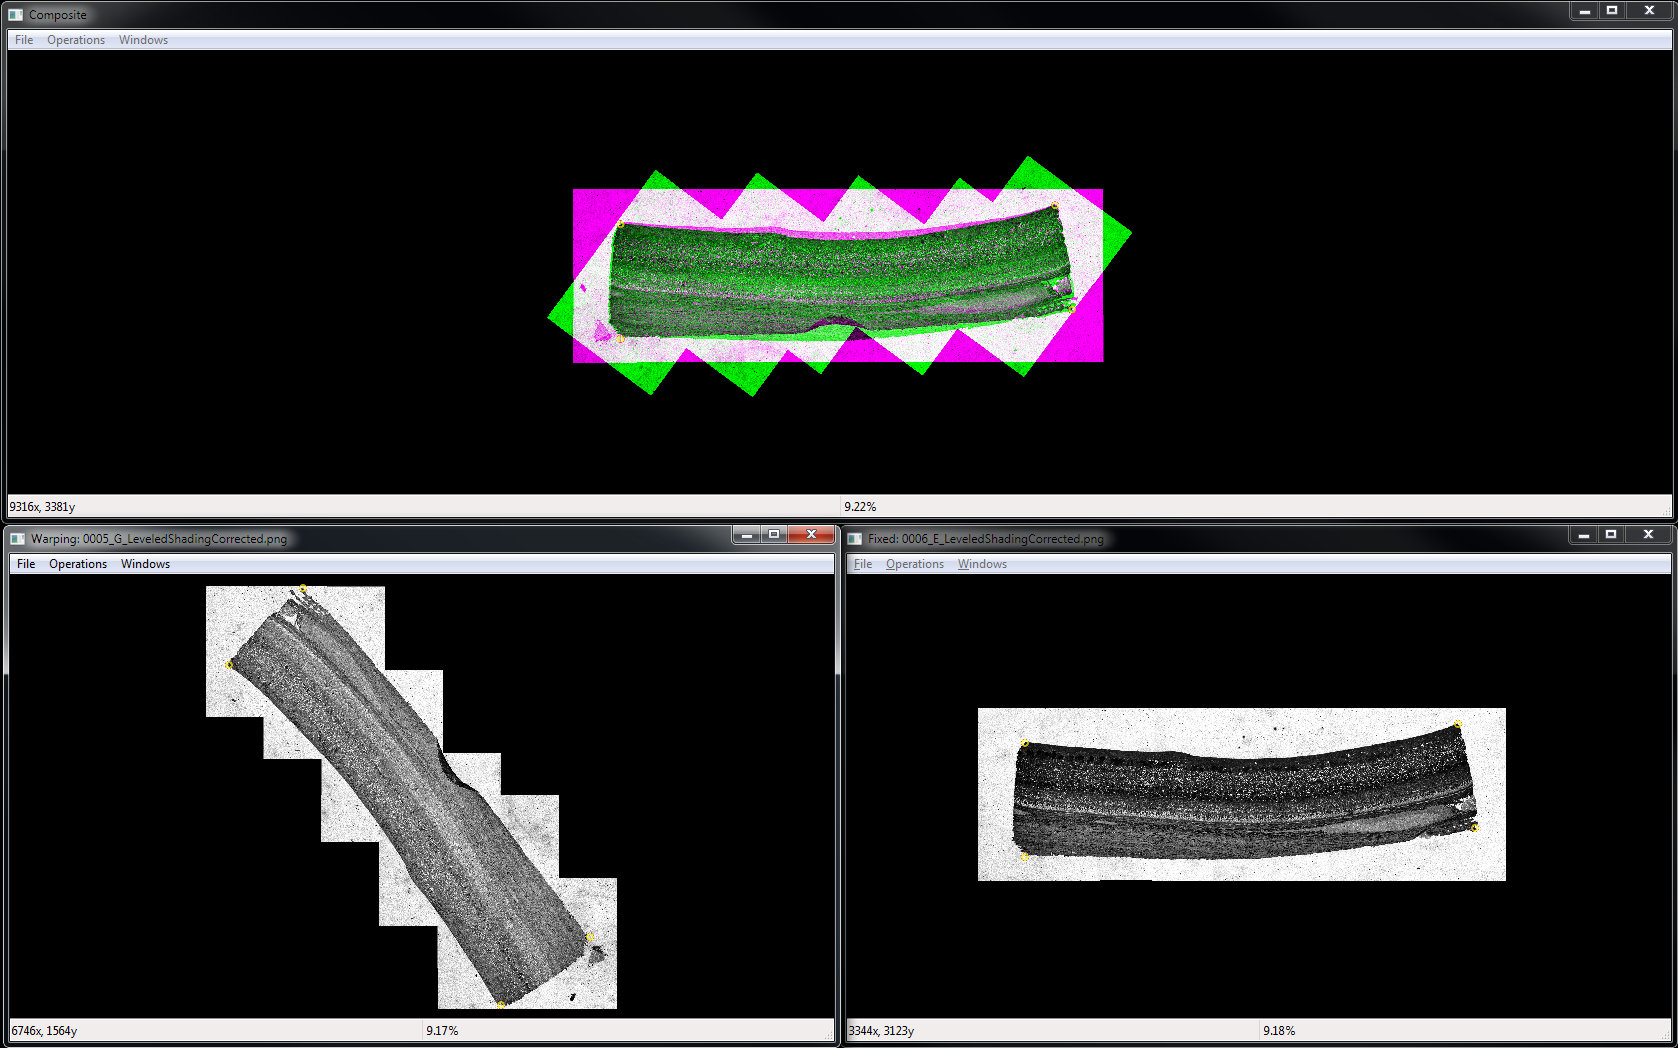
The result is a window containing images to register. Use the Window menu to automatically arrange the Pyre windows.
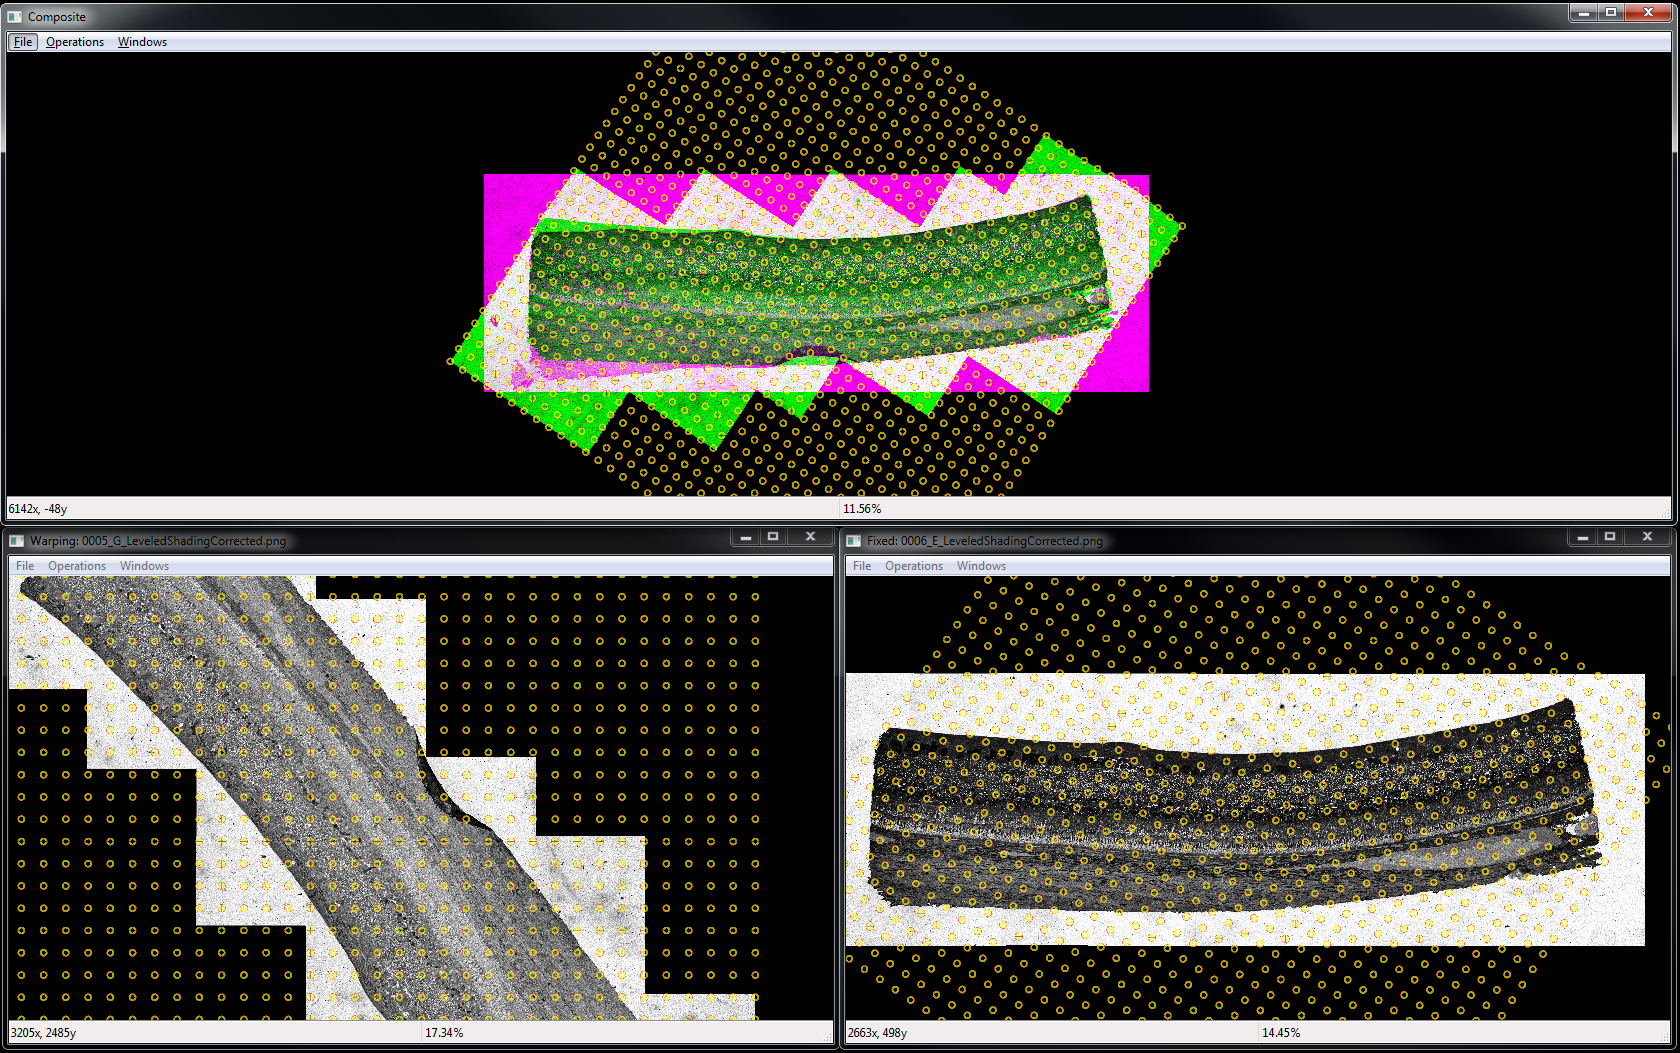
Clear points
The first step is to clear the points from using the Operations -> Clear all points menu item
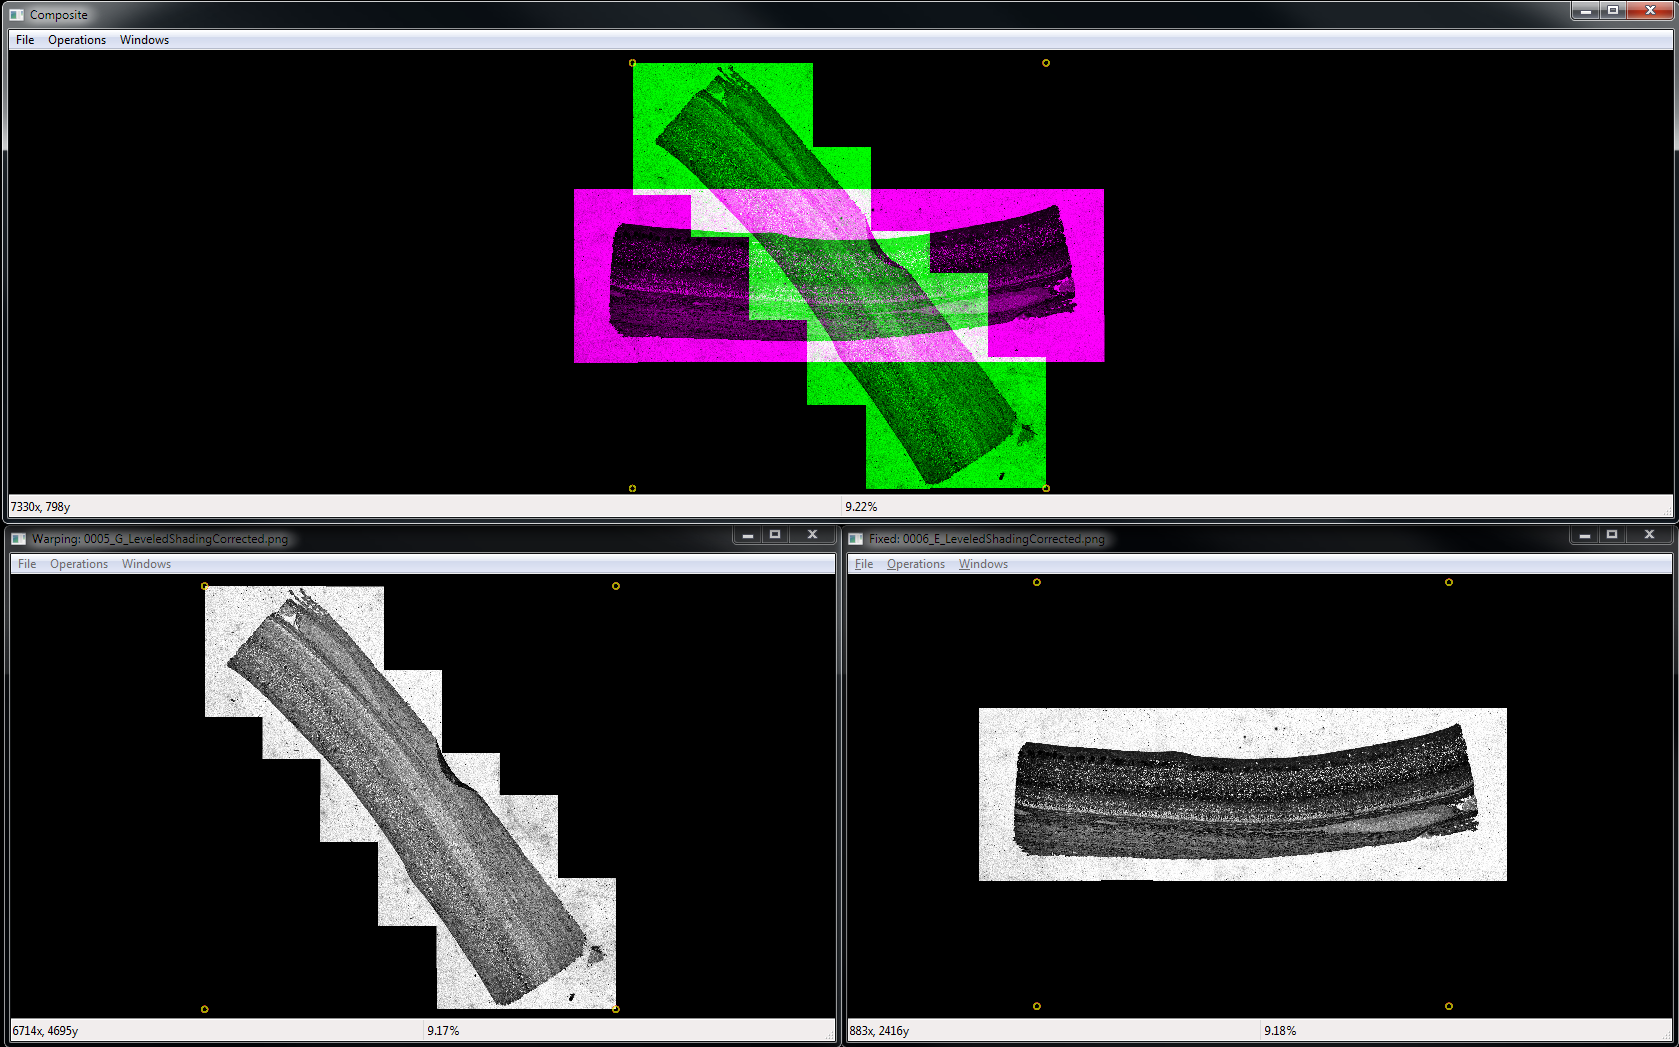
This leaves four points about the edge. I then place new points at the correct corners. The fastest method is shift + left click on the first image. Find the same spot on the second image and bring the most recently created point to that position by using alt + left click.
Once at least three points are placed we can delete the original three points by selecting them with shift + <right click>.
The result is a roughly aligned image.
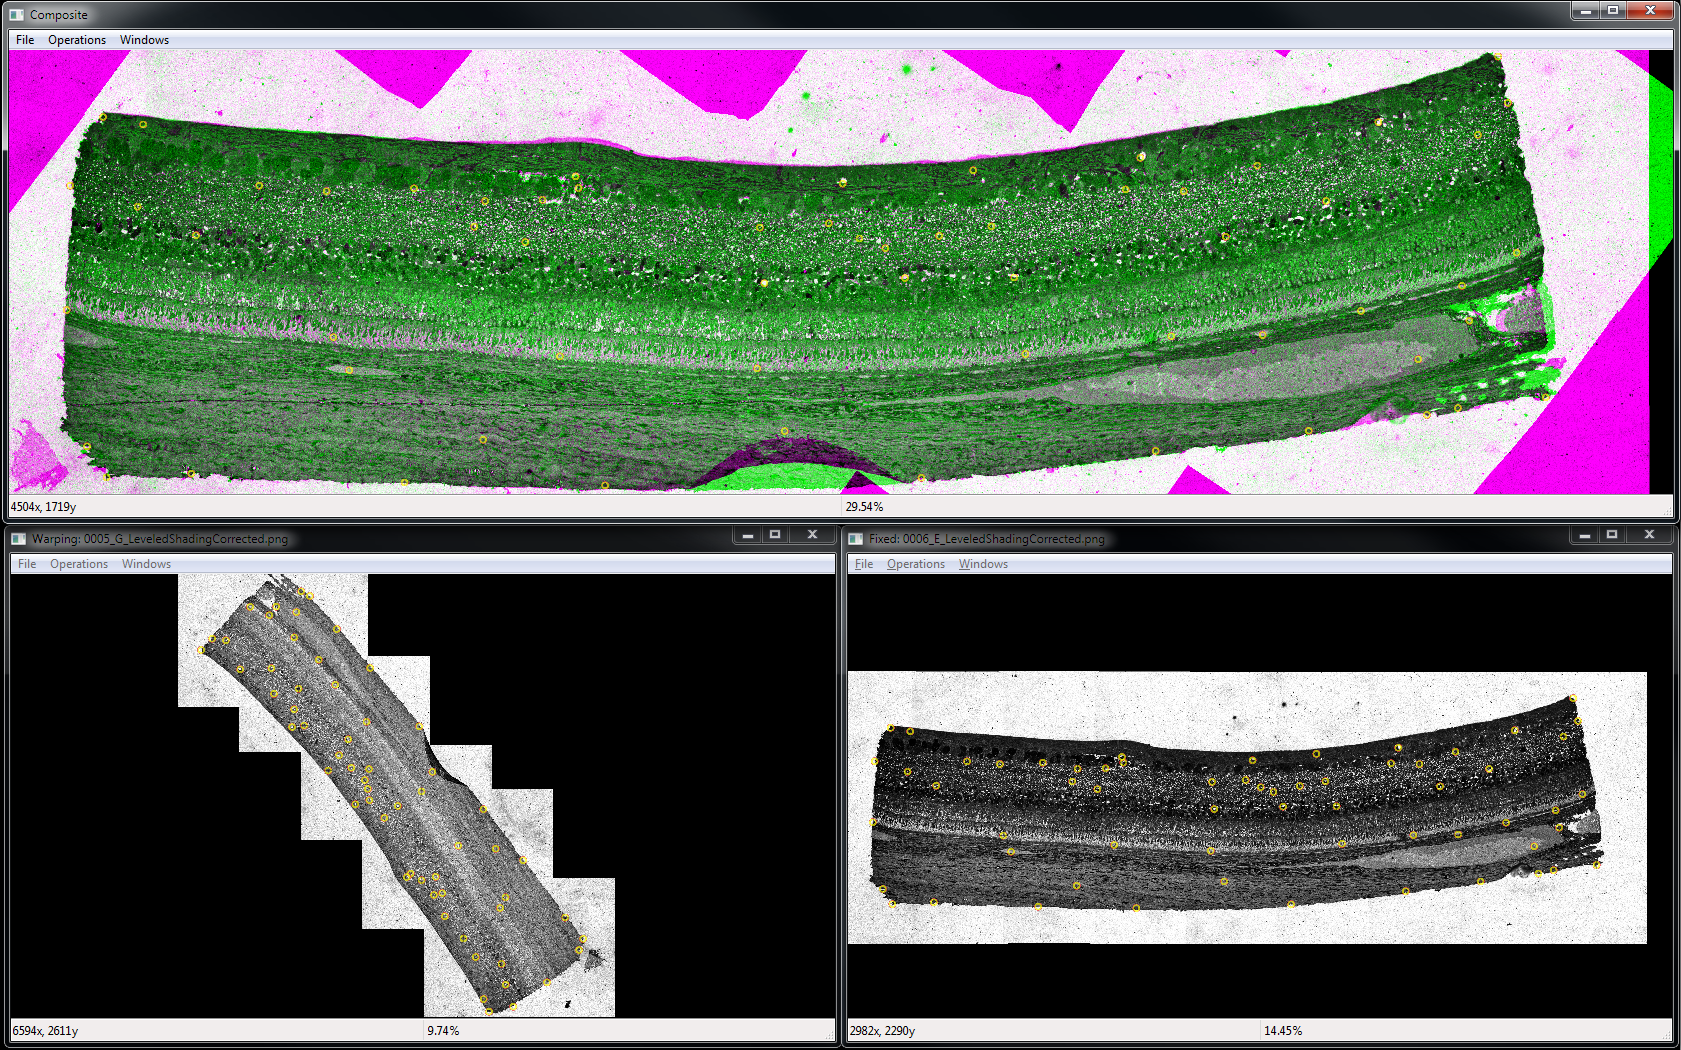
Auto placement
Pyre helps you align the points if desired. Hitting spacebar will attempt to automatically align the current blinking point. CTRL+Z will undo the last change for the point.
If this is the first stage of slice-to-slice registration this registration is likely sufficient since it will be refined by later stages. In our case I loaded the .stos file from the last refinement stage so whatever I save to the manual registration folder will be the final product. Because of this I continued placing points until the registration was quite accurate.
Export
When you are done select File -> Save Stos from the menu. Save the .stos file in the manual directory of the stos group you loaded the original .stos file from.
File -> Save Warped Image saves the registered image directly to disk.
Final Result
Once all manual registrations are in place one can re-rerun the CMPAlign script. This produces new output images incorporating the transform fixes generates new registered images.
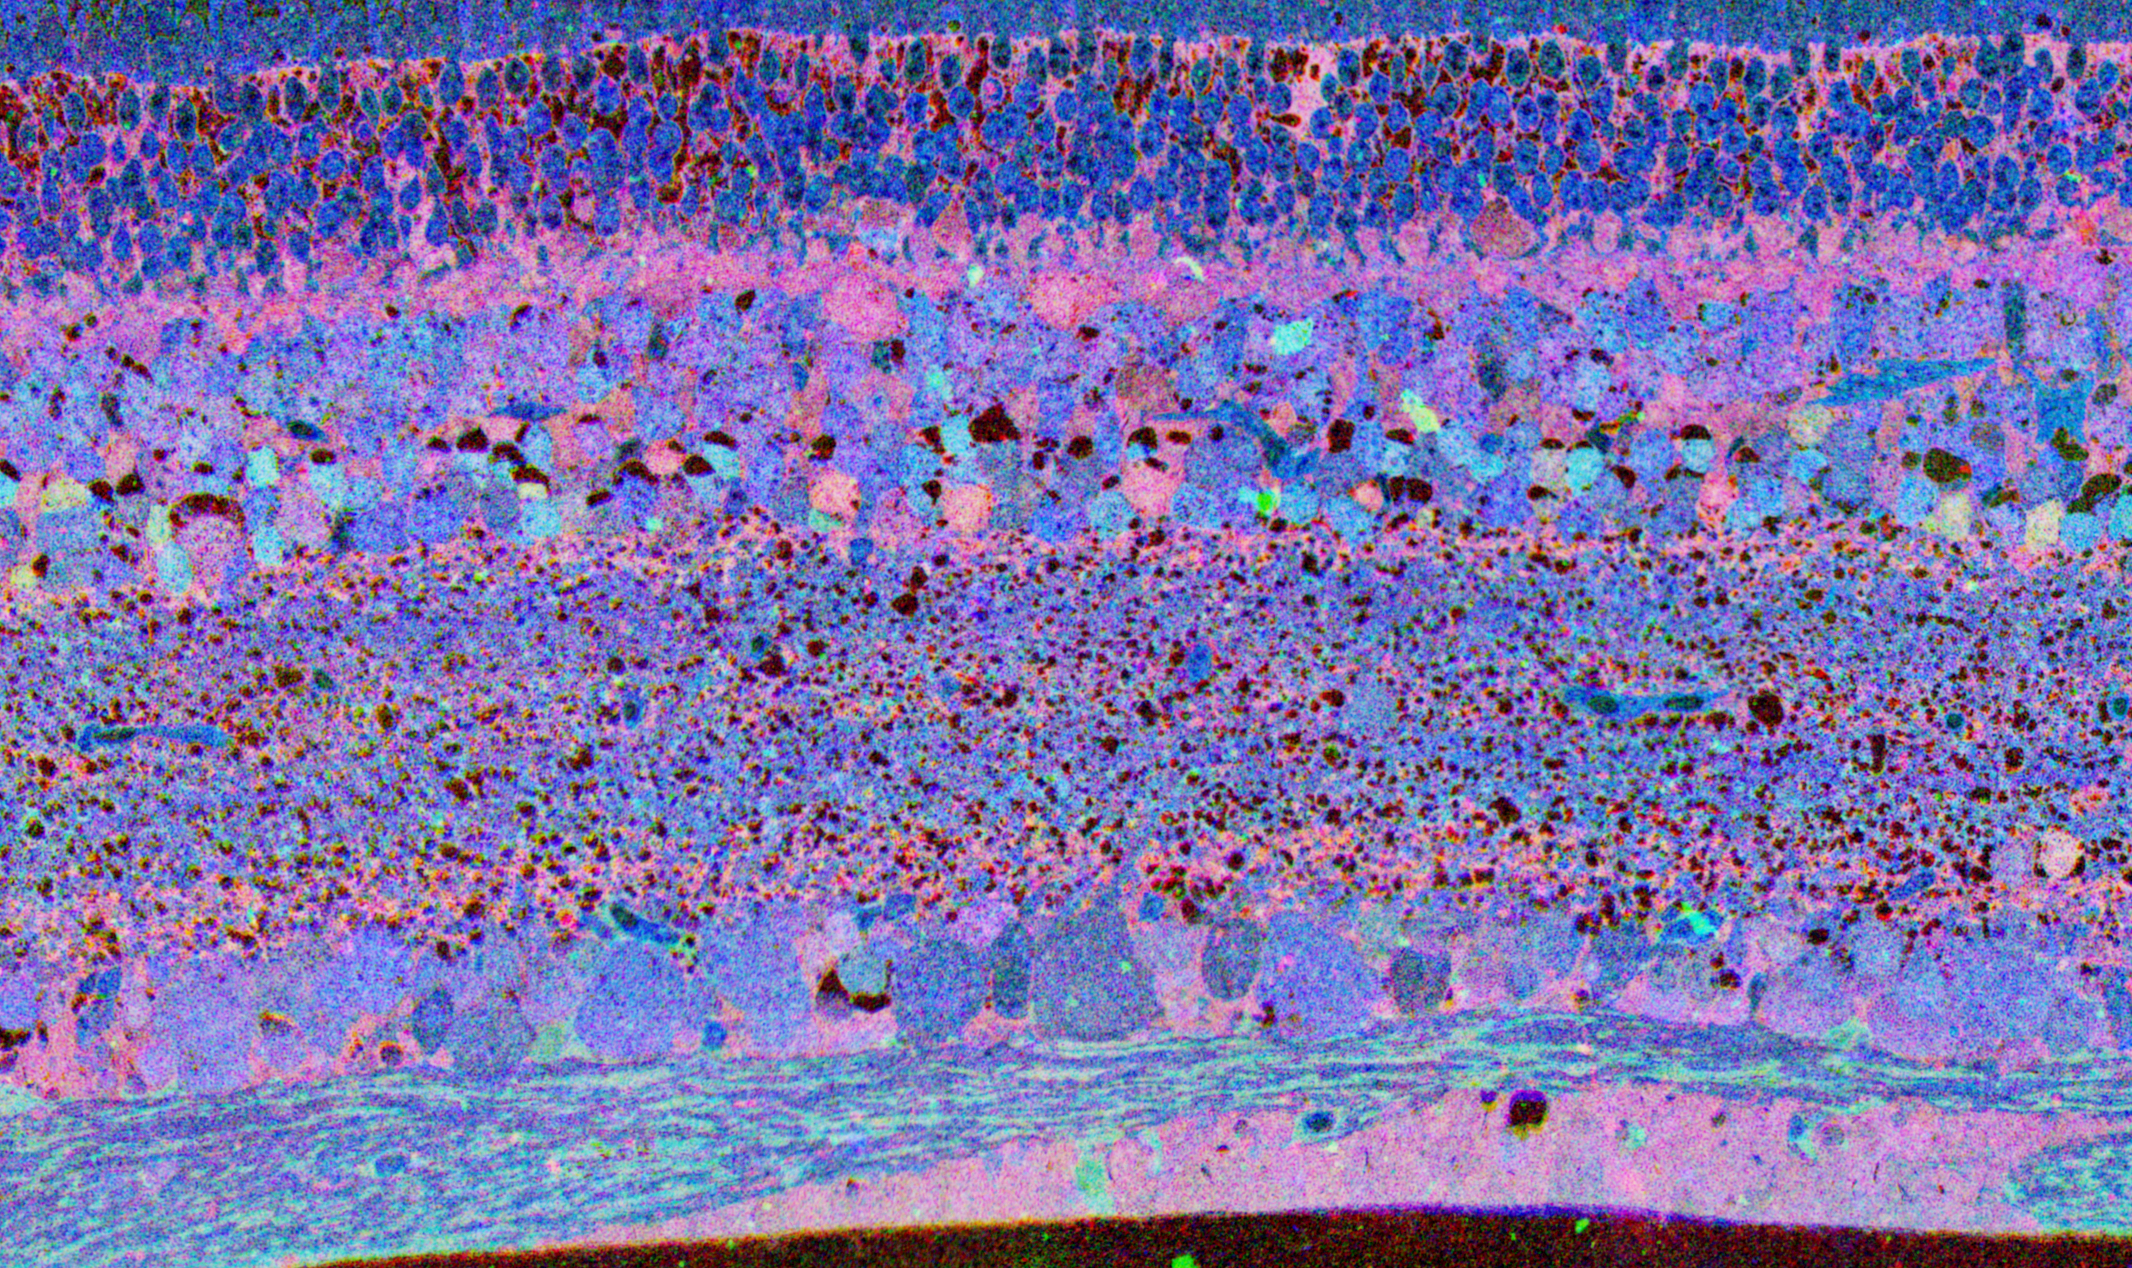
The image below shows the final product after using the manual corrections from this tutorial. GABA, Glutamate, and Glycine were assigned to Red, Green, and Blue channels respectively. Glutamate to Gl